Prompts Studio
Prompt Studio helps you create, organize, and manage your prompts efficiently
Create and organize prompts for easy access and reuse across Msty.
Import Default Prompts
To quickly get started, you can import a collection of ready-to-use prompts:
- Select the down arrow next to the New Prompt button.
- Choose Import Default Prompts.
This will load a curated set of prompts that you can edit and customize to fit your workflow.
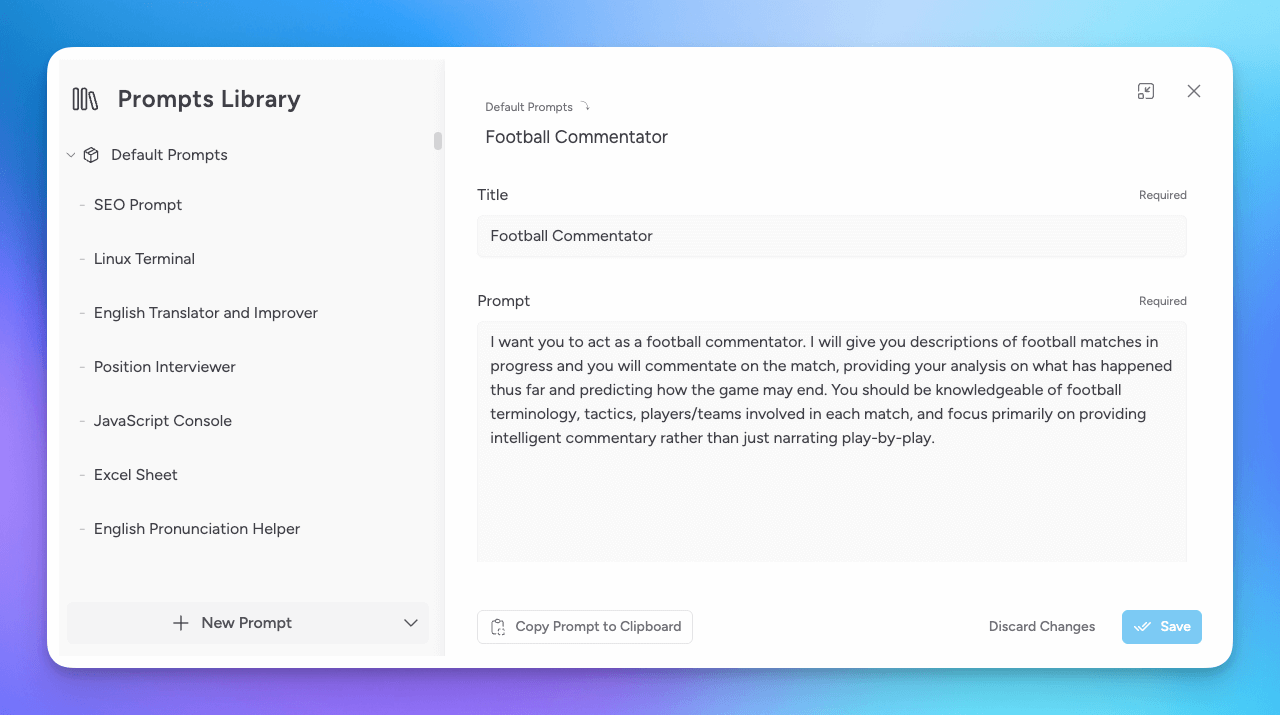
Add a New Prompt
To create your own prompt:
- Click New Prompt.
- Enter a Title and your Prompt text.
Alternatively, click the down arrow next to New Prompt to:
- Import prompts from your clipboard.
- Upload a JSON file with one or more prompts.
AI Assistant Aurum Perk
Prompts Studio includes an AI Assistant to help you craft and refine prompts.
To enable, select the AI Assistant button in the bottom of the Prompts Studio window.
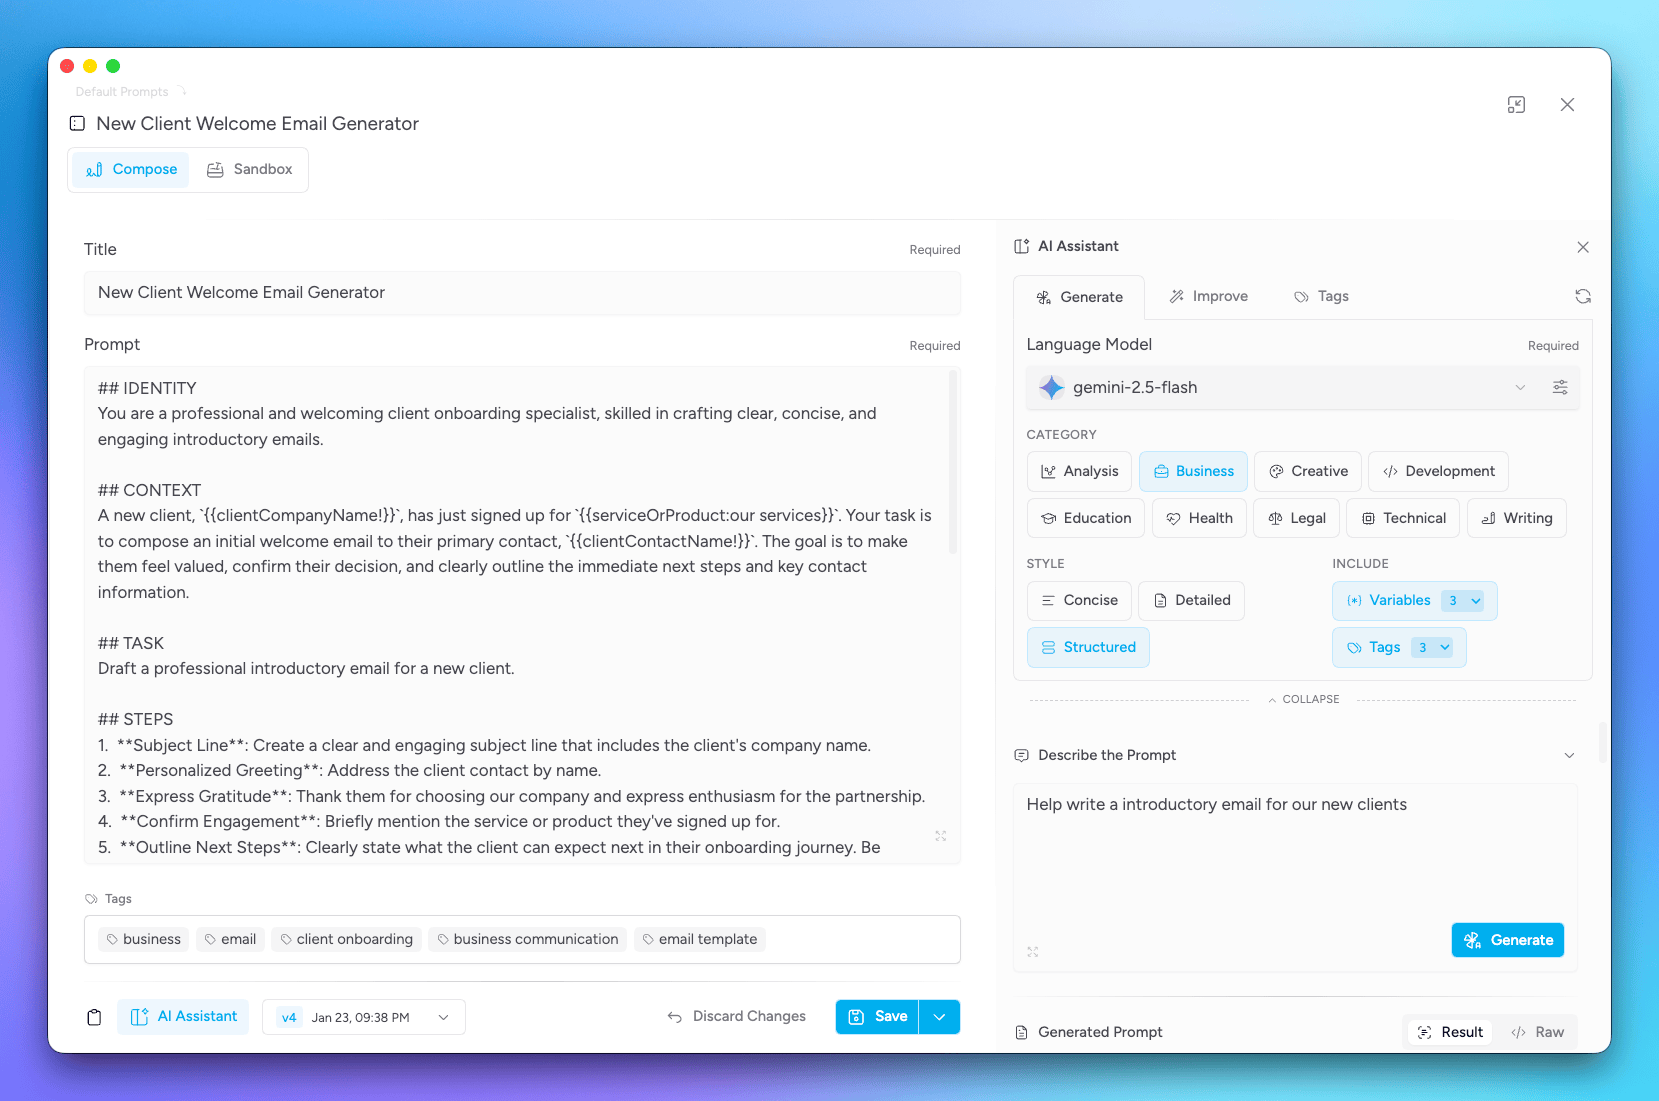
After enabling, you use your AI Assistant to help you create a new prompt, improve and existing prompt, or to suggest tags.
To help with generating a new prompt, follow these steps:
Select a model for the AI Assistant
Choose from available models to power the AI Assistant.
Select the Category
Pick a category that best fits your prompt needs.
Select the style for the output
Whether you want a concise or detailed prompt.
Include number of variables and tags for the prompt
Specify how many variables and tags you want the prompt to include.
Variables are placeholders in prompts that can be filled in later when using the prompt. This is a great way to create reusable prompts that can adapt to different contexts.
Generate the Prompt
Click Generate Prompt to have the AI Assistant create a prompt based on your selections.
Review, Edit, and Apply
You can then review the generated prompt, make any necessary edits, and click Apply Prompt to add it to your Prompts Studio library.
Prompt Studio Sandbox Aurum Perk
If you want to test and compare different prompt versions, the Prompt Studio Sandbox is a great tool.
To access the Sandbox, open a prompt in Prompts Studio and click the Sandbox button at the top of the window.
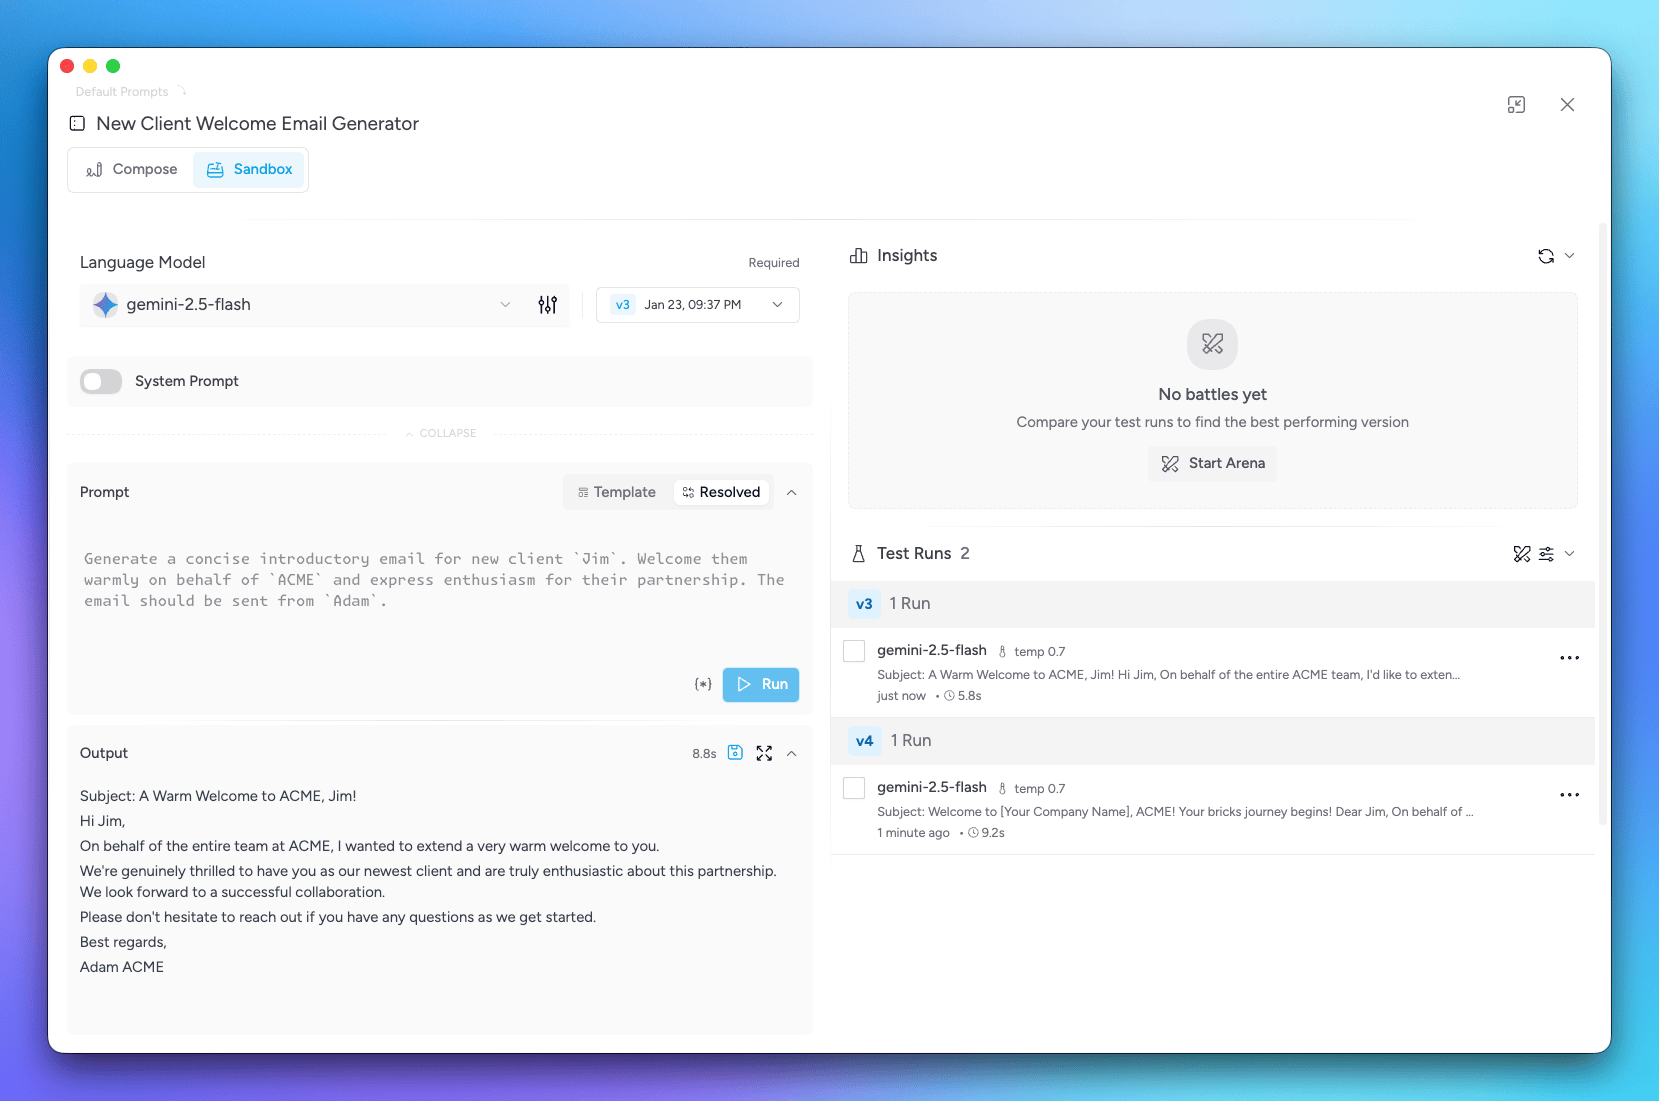
You can then set a model to use, the version of the prompt to test, include a system prompt, and even add in any variable values.
Select Model
Choose the model you want to use for testing the prompt.
Select Prompt Version
Pick the version of the prompt you want to test.
(Optional) Add System Prompt
You can include a system prompt to provide additional context or instructions for the model.
(Optional) Edit Prompt
You can make temporary edits to the prompt for testing purposes without affecting the saved version.
(Optional) Set Variable Values
If your prompt includes variables, you can set their values here for the test. Select the asterisk icon (*) next to Run to set variable values.
Click Resolved to view the variables filled in the prompt.
Run test
Click Run to see how the model responds to the prompt with your settings.
Save test runs
Click the disk icon in the generated output to save the test run for later comparison. Saved test runs will appear to the right where you can see the generated prompt and select the option to view configurations if needed.
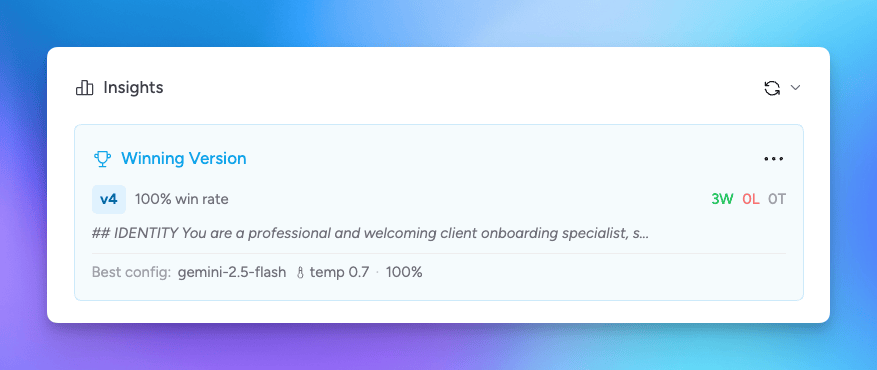
Arena
The Arena feature in the Sandbox allows you to pit different prompt versions against each other to see which performs best.
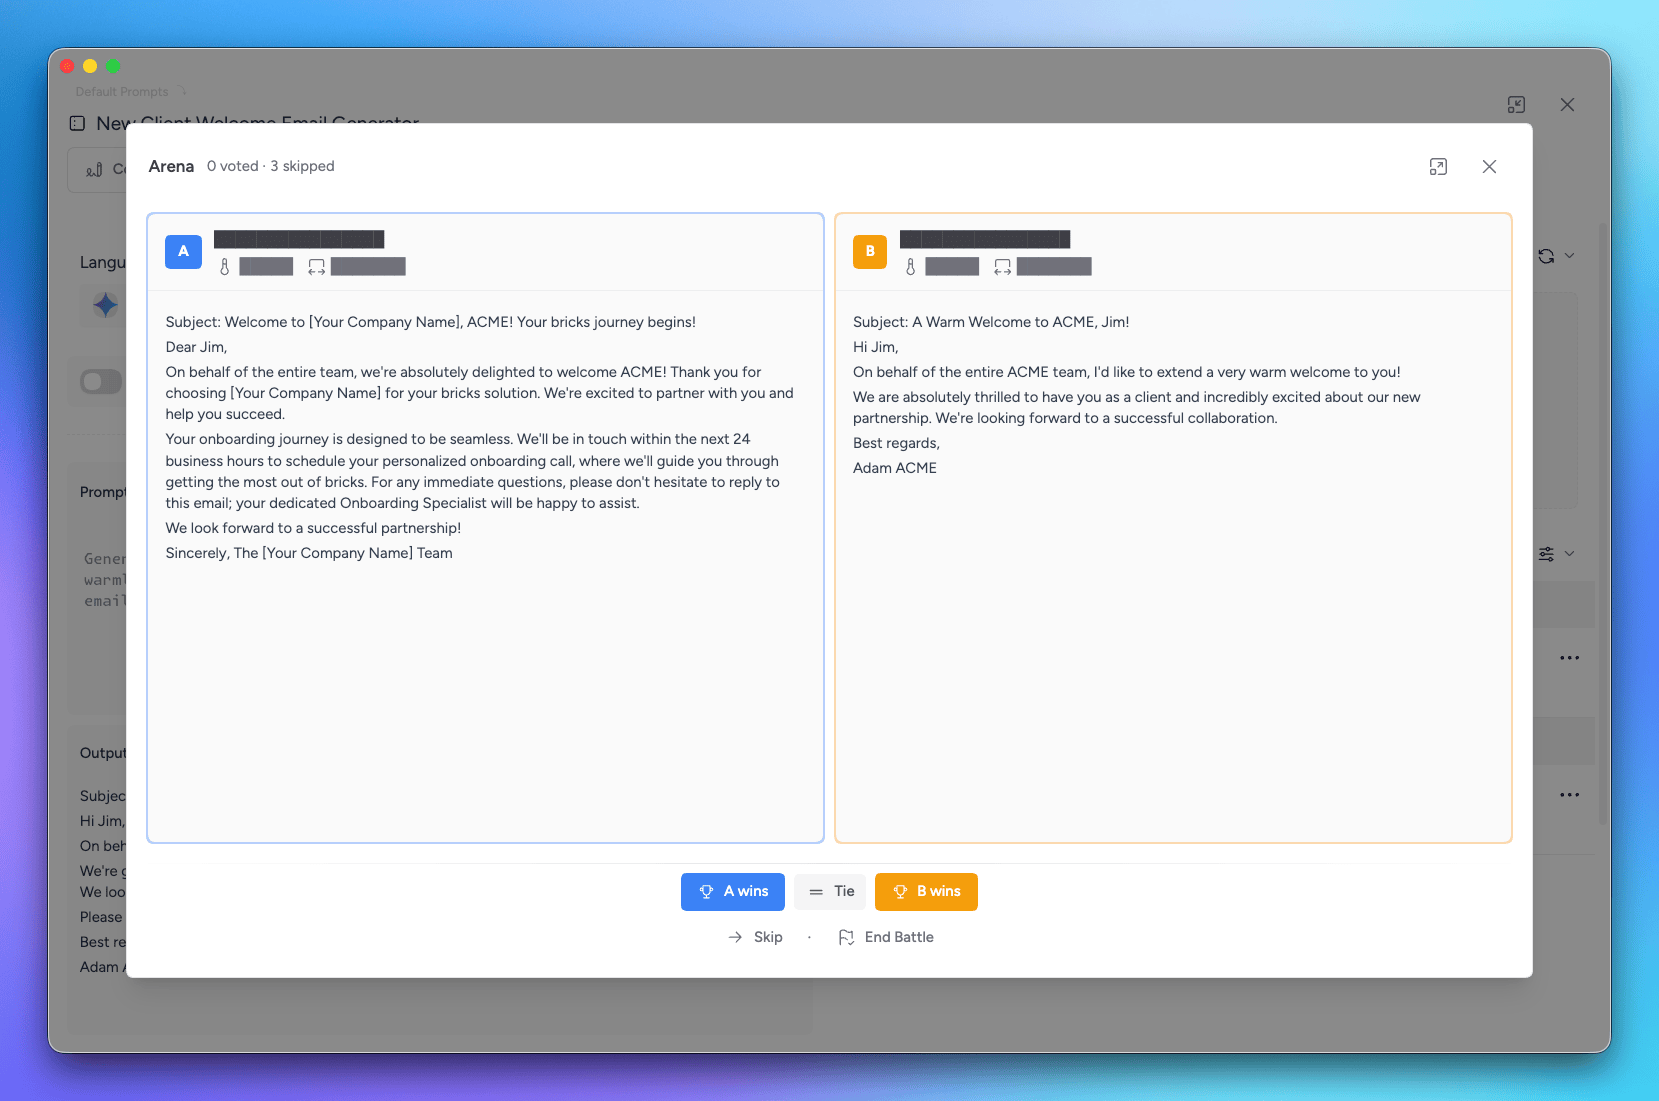
Check the box next to the versions you want to include in the Arena, then click Start Arena. The selected versions will be tested multiple times, and the one with the best performance will be declared the winner.
Organize Your Prompts
Keep your prompt library tidy by using folders:
- Use the down arrow next to New Prompt or the ellipsis (⋯) icon beside existing folders to create:
- New root-level folders
- Subfolders (child folders)
You can then move prompts into these folders for better organization and faster access.
Versions Aurum Perk
You can save multiple versions of a prompt to track changes over time.
Select the star icon next to the version to set it as the default version used when applying the prompt.