Live Contexts
Empower Msty Studio with Live Contexts in your toolbox
Live Contexts are external data sources that you can add to your conversation in the form of calling an API. This allows you to bring in information from various sources and services to provide more context and enhance the interaction with models.
Live Contexts can either use a simple GET request to fetch data from an endpoint. Or, it can be more dynamic by allowing the model to determine variables and parameters to include in the API call, allowing for more flexibility and adaptability based on the conversation.
Add New Live Context
Connect to your favorite APIs to enhance your conversations. You'll first want to identify an API you'd like to use and gather necessary information to connect to it, such as an API key.
Check out the Live Context Examples for some inspiration on APIs you can connect to.
- From the Toolbox section, select Live Contexts
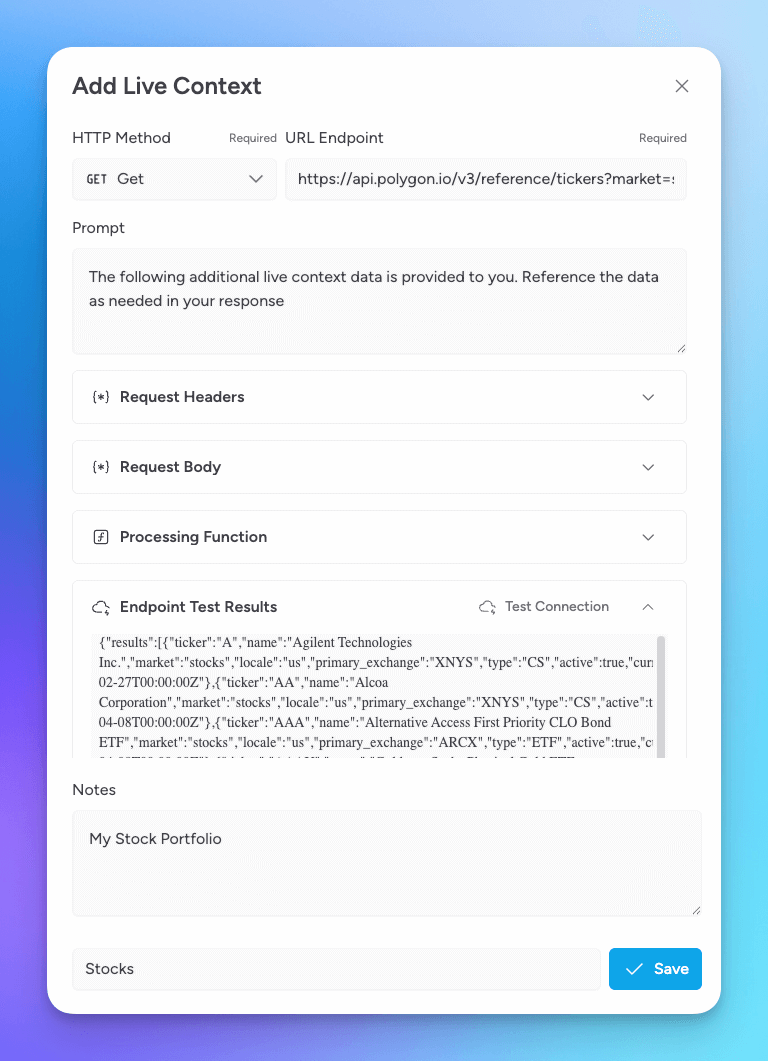
- Click on the Add New Live Context button
- Select an HTTP Method (GET or POST)
- Enter the URL Endpoint for the API you want to connect to. You can include variables in curly braces, such as
{query:'keyword'}, which the model can fill in dynamically - Adjust the Prompt if needed; you can still add prompts at the point of messaging
- Include any Request Headers needed for the API call, such as an Authorization header - you can also include variables here for the model to fill in
- Set Live Context Mode - by default, it is set to 'Push' which will send the Live Context data to the model automatically when included in a conversation. You can also set it to 'Pull' which will allow the model to decide when to call the Live Context during the conversation. Use the Pull mode option when using dynamic variables in the endpoint or headers that the model needs to fill in.
- Include any Request Body needed for the API call, such as a JSON body - you can also include variables here for the model to fill in
- Include any Processing Function needed to process the API response. The default is to return the response as a string which for most cases you can leave as-is
return JSON.stringify(data) - Test the endpoint by selelecting Test Connection and you can include test variables if needed
- Include any helpful Notes which is also visible to the models, which can help guide their use of the Live Context
- Provide a unique Name for the Live Context
- Select Add to save the Live Context
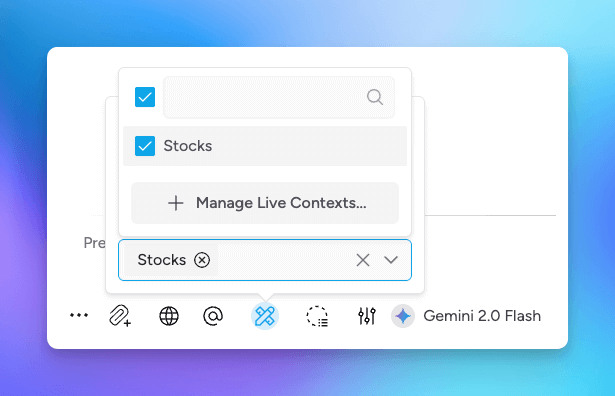
Using Live Contexts
Once you have created a Live Context, you can use it in your conversations by clicking on the Toolset icon and then select the Live Contexts you'd like to include in the conversation. You can even add multiple Live Contexts to a conversation.
Example endpoints
Check out the list of example endpoints for example endpoints you can play with.